Prep ingredients ahead of time only when the advance step makes a named later meal easier without creating a safety, cleanup, storage, or quality problem. Start from the recipe you plan to cook, then choose a limited task such as washing sturdy produce, cutting an ingredient that holds well, measuring a dry item, or portioning something for one specific use. Keep raw animal foods separate from ready-to-eat produce and cooked food, refrigerate perishable cut ingredients promptly, and label what each container is for. Leave fragile, oxidation-prone, or texture-sensitive work until closer to cooking when early preparation would reduce quality more than it saves time.
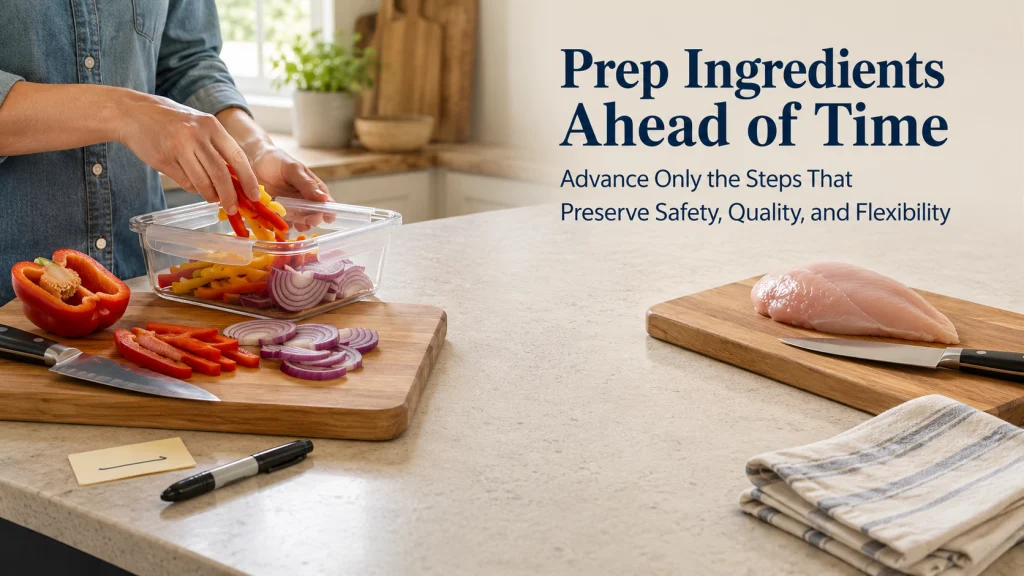
The Same Advance-Prep Idea Can Create Four Very Different Weeknights
Picture four households planning the same weekday recipe with poultry, vegetables, herbs, and a measured sauce. The ingredients are identical, but the advance work leads to four different outcomes.
| Advance-prep outcome | What happened | What the cook faces later |
|---|---|---|
| Useful preparation | Sturdy vegetables were washed under running water, cut on a clean board, covered, labeled, and refrigerated for the named meal. | The slow weekday task is already finished, and the ingredients are still suitable for cooking. |
| Quality loss | Delicate herbs were washed, chopped, and stored too early for the texture the recipe needs. | The meal is faster to assemble, but the ingredient no longer gives the intended freshness or appearance. |
| Cross-contamination | Ready-to-eat produce was handled beside raw poultry with shared tools and no cleaning step between tasks. | The saved cutting time creates a food-safety problem that cannot be solved by a neat container arrangement. |
| No preparation | Every ingredient remains untouched until the cooking session. | The food may keep its original quality, but the weekday bottleneck is unchanged. |
The useful result is not a refrigerator crowded with containers. It is a calmer cooking session in which the right ingredient is ready, the delicate parts still feel fresh, and no one has to wonder whether a container is safe to handle or what meal it belongs to.
Keep Ingredient Prep Separate From Cooked Components and Complete Meals
Ingredient prep ends before the main cooking step. It can include washing produce, trimming, peeling, cutting, measuring, portioning, or combining a limited set of uncooked ingredients for a planned use. The ingredient is prepared for a later recipe rather than cooked into a finished building block.
Cooked rice, roasted vegetables, simmered beans, and cooked proteins belong to component meal prep. An assembled casserole, fully prepared lunch, or finished refrigerated dinner belongs to make-ahead meals. The broader batch-cooking guide helps choose among these methods before the kitchen session begins.
Key decision: Stop calling the work ingredient prep once the main cooking step has produced a ready-to-use cooked component or a completed meal. That boundary keeps safety, storage, and later instructions clear.
Select Each Task From a Named Later Recipe or Meal
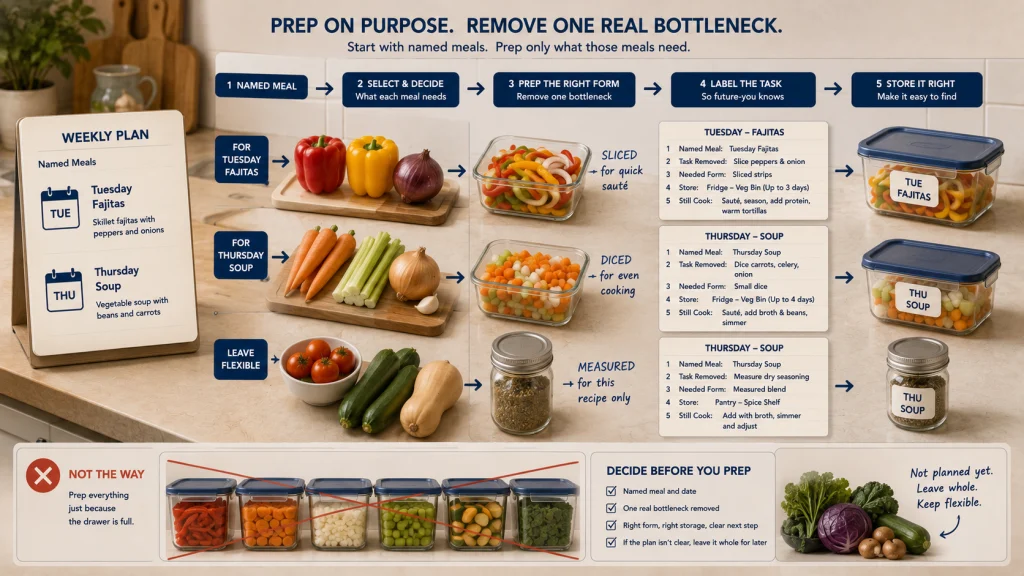
Begin with the cooking task, not with the produce drawer. A tray of peppers does not need to become a row of identical containers. A plan for Tuesday fajitas and Thursday soup gives each pepper a destination, a cut size, and a clear place in the week.
For every proposed task, write down five details:
- The meal or recipe that will use the ingredient.
- The exact step you want to remove from the later session.
- The form needed later, such as whole, sliced, diced, peeled, or measured.
- The storage destination after preparation.
- The instruction the later cook must still complete.
When the intended use is unclear, flexibility is more valuable than visible progress. Whole produce, an unopened package, or an unmeasured pantry item can still move with the week, while a container cut into the wrong size may quietly become the item nobody reaches for.
| Ingredient-task decision | Prepare now when | Leave for later when |
|---|---|---|
| Wash | The ingredient has a planned use, can be dried and stored appropriately, and washing removes a meaningful later step. | Early washing is likely to leave excess moisture or reduce the quality needed for the recipe. |
| Cut or peel | The cut size is known, the ingredient holds acceptably, and the task is a real weekday bottleneck. | The ingredient browns, wilts, dries, softens, or loses the texture the meal depends on. |
| Measure | The quantity and recipe are fixed, and the ingredient can be stored without confusion or loss. | The amount may change, the ingredient is easily mistaken for another item, or measuring early adds another container without saving time. |
| Mix | The combination is safe, stable, clearly labeled, and meant to remain together until use. | The ingredients react, soften each other, separate poorly, or need different storage conditions. |
| Marinate | The recipe, timing, refrigeration, container, and later cooking instruction are all defined. | The plan is vague, the timing is uncertain, or the process would mix raw-food handling with ready-to-eat preparation. |
Use a meal-prep schedule when the problem is deciding which day each task belongs on rather than deciding whether the task should happen early at all.
Wash Hands, Work Surfaces, Tools, and Produce Correctly
Once the tasks have clear destinations, the next priority is a clean start. Wash your hands, clear the work area, and clean the board, knife, bowls, measuring tools, and nearby surface before beginning. Wash produce under running water and dry it when the next step or storage method requires a dry surface.
Safety warning: Do not wash produce with soap, detergent, bleach, or commercial produce wash. Do not rinse raw poultry. Splashing can spread contamination to the sink, faucet, counter, utensils, and nearby food.
Washing everything at once is not automatically efficient. A sink full of produce can create extra drying, sorting, and container work. Wash the amount connected to the named meals, then reset the area before moving to a task with a different contamination risk.
Separate Raw Animal Foods From Ready-to-Eat Produce and Cooked Food
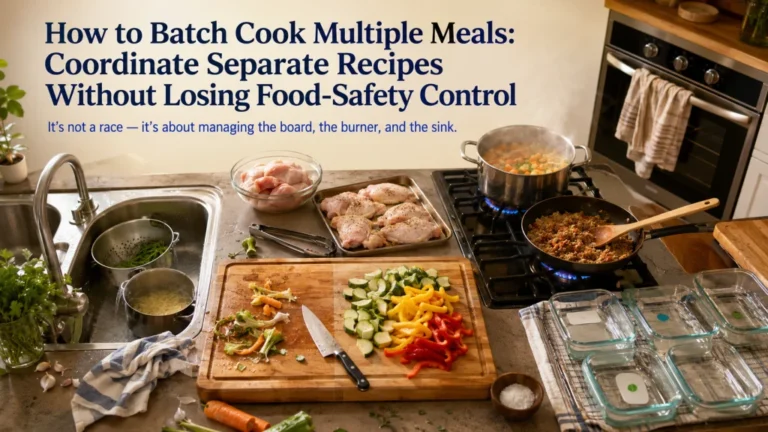
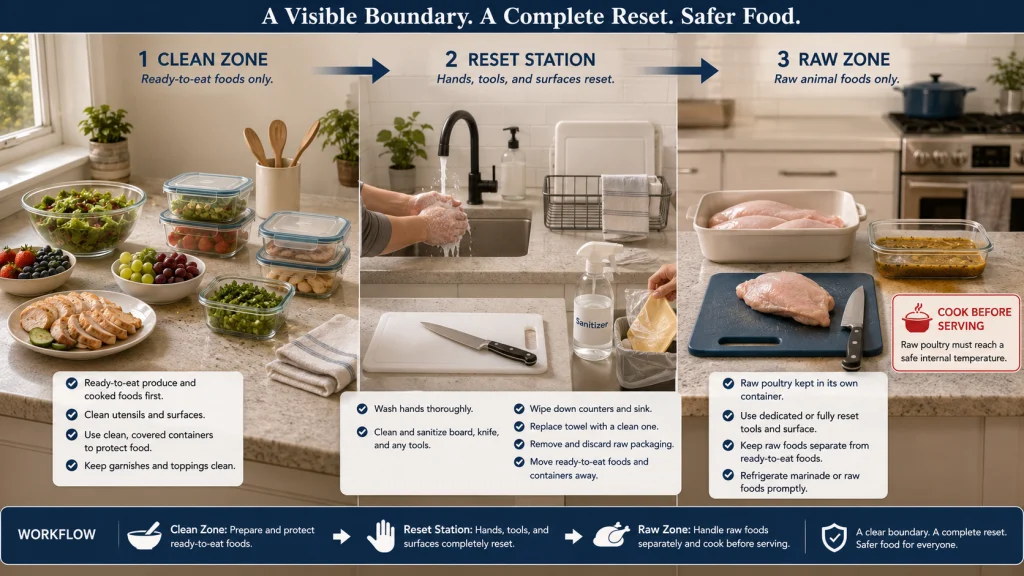
A clean sink and board are only the beginning. The prep order must also protect anything that may be eaten without another cooking step. Ready-to-eat produce, garnishes, cooked food, and clean utensils should not share an unclean board, knife, container, towel, or work zone with raw meat, poultry, seafood, or their packaging.
Raw-versus-ready-to-eat separation diagram:
Clean zone: ready-to-eat produce, cooked food, clean containers, clean utensils
↓ Finish, cover, label, and move these items away
Reset step: wash hands, clean and sanitize the work surface as appropriate, replace or thoroughly clean tools
↓ Confirm that clean containers are not sitting beside raw packaging
Raw zone: raw meat, poultry, seafood, marinades that contacted raw food, and the tools used with them
↓ Refrigerate promptly and preserve the later cooking instruction
Separate cutting boards can make the distinction easier to see, but color alone does not keep food safe. The board still needs the correct cleaning step, and a knife or hand can carry contamination from one zone to another.
Practical tip: Prepare ready-to-eat items first, move them into clean covered containers, clear the area, and then handle raw animal foods. This reduces the number of times the kitchen must switch back and forth between clean and raw tasks.
Decide Whether Cutting, Peeling, Measuring, Mixing, or Marinating Saves Real Work
After safety and separation are settled, count the hidden work. Cutting a large, sturdy vegetable may remove the one task that makes dinner feel difficult. Measuring a few pantry ingredients may simply move two easy scoops into several containers that must be filled, labeled, opened, and washed.
Before adding another task to the session, check whether it earns its place:
- Will this task still need to be done for the planned meal?
- Does doing it now preserve acceptable safety and quality?
- Will the prepared form remain clearly identifiable?
- Is the later time saved greater than today’s extra washing, drying, labeling, and storage work?
Mixing deserves extra caution because ingredients can change one another. Salt, acids, moisture, and absorbent ingredients may alter texture while they sit. Marinating also creates a raw-food handling task that needs a defined refrigerated destination and clear cooking instructions. This article does not set universal marinating times or teach food-specific marinating safety.
Leave Fragile and Texture-Sensitive Steps Until Later
Even a safely prepared ingredient can be disappointing by the time dinner arrives. Delicate herbs may wilt after washing and chopping. Some cut produce browns, dries, softens, releases water, or absorbs nearby odors. A crisp topping may lose the contrast that made it useful in the first place.
Quality does not follow one universal timeline. The variety, maturity, cut size, moisture, container, refrigerator conditions, and final recipe all affect the result. Instead of memorizing one list of foods that can always be chopped early, decide what quality the later meal needs.
A task left for later is not a failure of preparation. It is a deliberate choice to protect the part of the meal that does not hold well.
Refrigerate Perishable Cut Ingredients Promptly in Suitable Covered Containers
When an early task passes the quality test, finish the storage step without letting the session drift into an extended sorting project. Once a perishable ingredient has been washed, cut, peeled, mixed, or removed from protective packaging, move it into a clean suitable container, cover it, and refrigerate it promptly.
Container choice should match the food and the later task. The container needs enough room for the prepared form without crushing it, a closure that protects it from contact and spills, and a shape that fits the refrigerator destination. Excess trapped moisture can harm the quality of some produce, while an uncovered container can dry food or expose it to other items.
Safety warning: Do not use smell, appearance, or taste as the sole test of whether prepared food is safe. Do not apply one universal number of storage days to every cut ingredient. Use food-specific storage guidance and discard food when its safety is uncertain.
For food-specific storage decisions, use the meal-prep storage guide rather than extending the prep session based on a general rule.
Preserve the Label, Date, Intended Meal, and Cooking Instruction
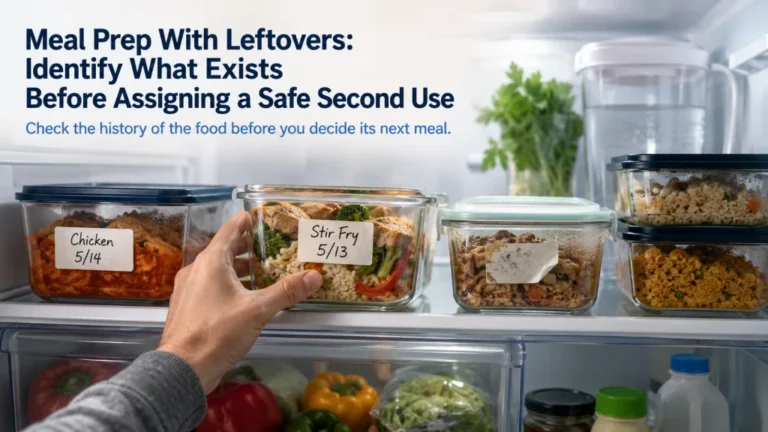
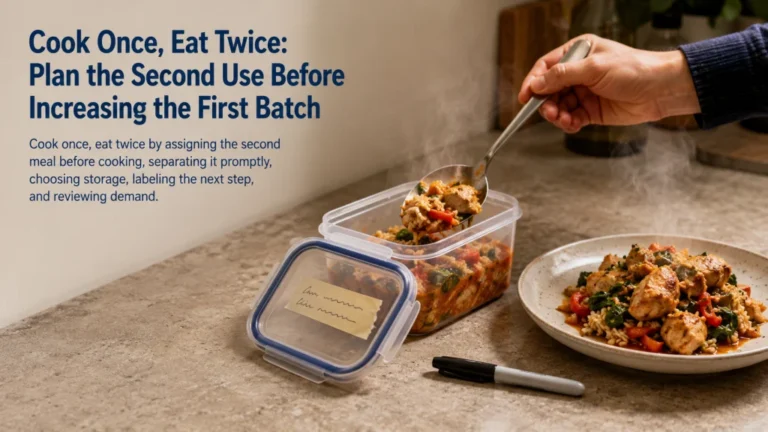
A covered container can still become a kitchen mystery. Removing an ingredient from its original package may also remove the name, use-by information, preparation instructions, allergen details, cooking directions, and other information the household needs later. Keep the original label when it remains useful, or transfer the needed information clearly.
Label example:
Contents: sliced bell peppers and onions
Prepared: Monday evening
Planned use: Tuesday fajitas
Still required: cook before serving
Keep separate from: raw poultry container
On a busy evening, a useful label should answer the next person’s questions before they have to ask. “Vegetables” is less useful than “soup vegetables for Thursday.” A raw ingredient should never look like a ready-to-eat item simply because both are stored in matching containers.
Note: A date records when the task happened. It does not create a universal safe storage window. Food-specific guidance and the ingredient’s condition still matter.
Compare Knife, Board, Chopper, Scale, and Container Workload as One System
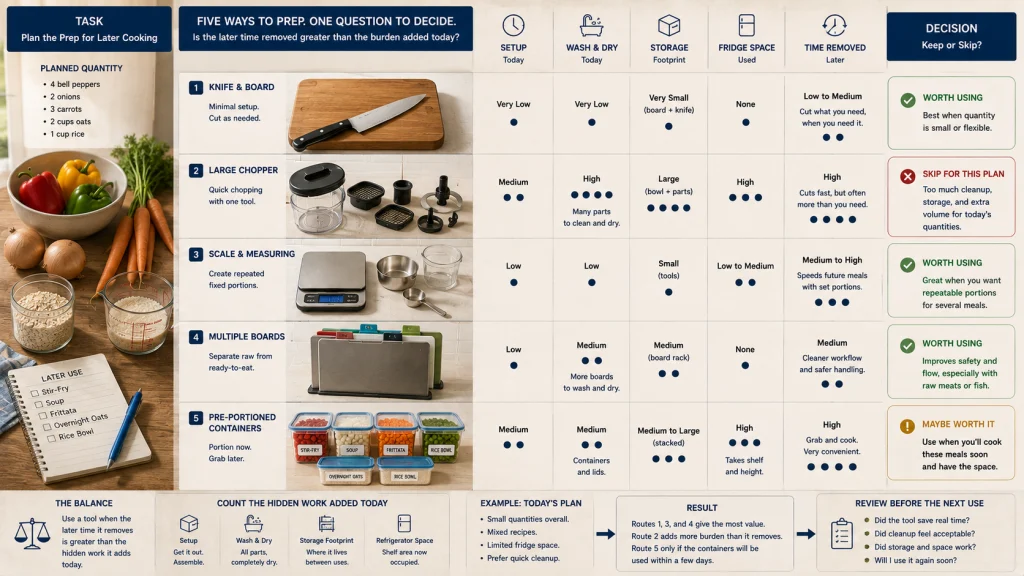
Only after the task itself is worth doing should the tool enter the decision. A chopper may shorten the cutting motion but add a lid, grid, pusher, bowl, and blade to wash. A scale may simplify repeated measuring but offer little value for a single ingredient that can be portioned during cooking. Extra boards can support separation but also require counter space and a complete cleaning routine.
| Tool or method | Possible time saved | Added workload to count | Better-fit condition |
|---|---|---|---|
| Knife and board | Direct control over cut size with minimal setup | Knife handling, board cleaning, and repeated cutting | A modest amount with varied cuts or limited storage space |
| Manual or powered chopper | Faster repeated cuts for suitable ingredients | Assembly, multiple parts, trapped food, washing, drying, and storage | A planned quantity large enough to justify the cleanup |
| Scale or measuring tools | Repeatable portions for a fixed recipe | Extra containers, labels, and washing | Several named uses require the same measured amount |
| Multiple cutting boards | Clearer separation between task categories | Counter space, cleaning, drying, and storage | The boards support a consistent raw-versus-ready-to-eat workflow |
| Pre-portioned containers | Faster retrieval for a specific later recipe | Container matching, labeling, refrigerator space, and cleanup | Each portion has a named use and avoids opening several packages later |
Editorial observation: A larger chopper may reduce cutting time while creating more parts to wash and more prepared food than the recipe needs. Capacity is useful only when the later meals, refrigerator space, and cleanup burden justify using it.
For broader equipment and capacity decisions, use the guide to meal-prep tools and appliances. For arranging boards, waste bowls, clean containers, and raw-food zones during the session, review kitchen organization for meal prep.
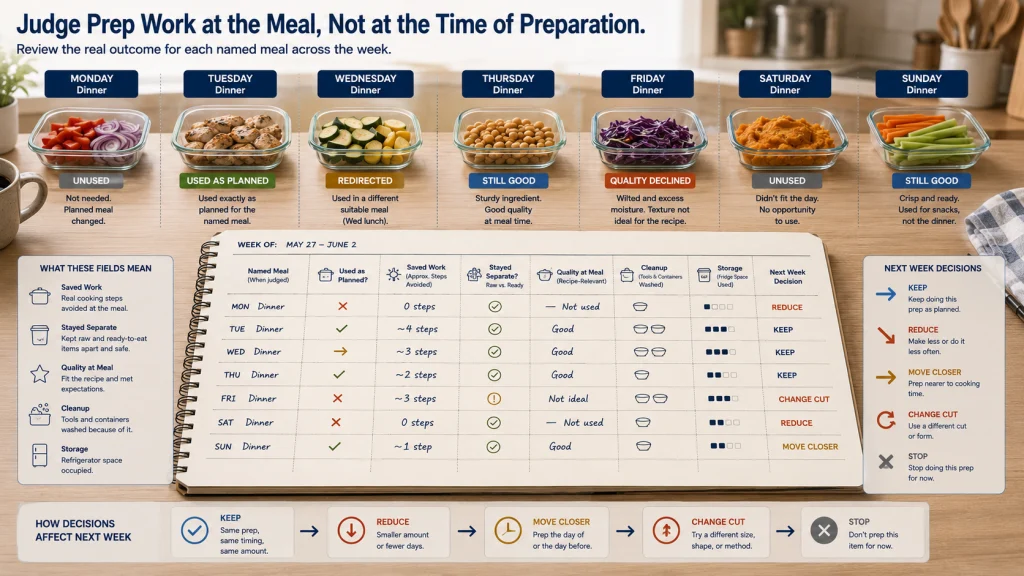
Run a One-Week Task-Savings Review
The weeknight result is the final test. Choose a small set of tasks rather than rebuilding the entire routine, then notice what happens when each prepared ingredient reaches the meal it was meant to support. A container that looked efficient on Sunday may feel genuinely helpful, unnecessary, or inconvenient by Wednesday.
| Review question | What to record |
|---|---|
| Was the ingredient used for its named meal? | Used as planned, redirected, or left unused |
| Did the advance task remove a real bottleneck? | Minutes or steps avoided during the later session, described approximately rather than precisely timed |
| Was safety separation easy to maintain? | Whether hands, tools, boards, containers, and refrigerator placement stayed clearly separated |
| Did quality remain acceptable? | Texture, moisture, browning, wilting, odor transfer, or other recipe-relevant changes |
| How much cleanup and storage work was added? | Tools washed, parts dried, containers used, and refrigerator space occupied |
| What should change next week? | Keep the task, reduce the quantity, move it closer to cooking, change the cut, or stop doing it early |
Keep the tasks that are used as planned and make the later session calmer. Reduce the quantity, move the task closer to cooking, or remove it when the result is forgotten containers, unnecessary washing, or an ingredient prepared in the wrong form.
Prepare the Task, Not the Entire Refrigerator
Before the next prep session, choose one meal and write down five things: the task to complete, the separation it requires, the storage destination, the label, and the later use. Then prepare only enough to support that plan.
This smaller approach leaves room for real life. When dinner changes, an ingredient kept whole or clearly labeled is easier to redirect than a refrigerator full of anonymous cuts. When the plan holds, the weekday cook receives exactly the help that was intended.
For the full process beyond this uncooked stage, use the complete meal-prep guide to connect planning, cooking, storage, and weekday use.
FAQs
🥕 Can I chop all my vegetables at the start of the week?
Not every vegetable or recipe benefits from the same timing. Prepare only the amount connected to named meals, and leave browning-prone, fragile, moisture-sensitive, or texture-critical cuts until closer to use.
🚿 Should I wash produce before refrigerating it?
Wash produce under running water when doing so supports a planned task, then dry and store it appropriately. Do not use soap, detergent, bleach, or commercial produce wash, and avoid washing a large amount merely because it is available.
🔪 Do separate cutting boards prevent cross-contamination?
They can make task separation easier, but they do not replace handwashing, correct cleaning, and control of knives, towels, containers, and work surfaces. A board’s color does not keep food safe when the rest of the workflow crosses between raw and ready-to-eat zones.
🏷️ What should I put on an ingredient-prep label?
Record the contents, preparation date, intended meal, and any remaining cooking instruction. Preserve relevant information from the original package when removing it would make the ingredient harder to identify or use safely.
🧊 How long can cut produce stay in the refrigerator?
There is no single storage period that fits every cut ingredient. Variety, condition, cut size, moisture, container, refrigerator conditions, and food-specific guidance all affect the answer, so do not rely on smell or appearance alone.
⏱️ How do I know whether advance prep actually saves time?
Compare the weekday step removed with the extra washing, drying, labeling, container, and refrigerator work added during prep. Keep the task when it reliably removes a real bottleneck and the prepared ingredient is used as planned.